Bootstrap Checkbox Example
Introduction
From time to time the simplest things might actually get extremely necessary-- specifically the moment you come to need them. For instance how do your website visitors connect with the web pages you build claiming a basic Boolean act-- simply just yes or no regarding a number of the issues you need to request, the way they do agree to the terms or line up a handful of the attainable options they might possess. We in most cases get past this with no paying a lot of an consideration to the element chargeable for these types of activities still, the Bootstrap Checkbox Input is certainly a very significant component-- one our forms just can't in fact perform without.
In the current fourth version of the Bootstrap framework we are offered with the
.form-check.form-check-label<div>.form-check.form-check-label<label><input>.form-check-inputEfficient ways to utilize the Bootstrap checkbox:
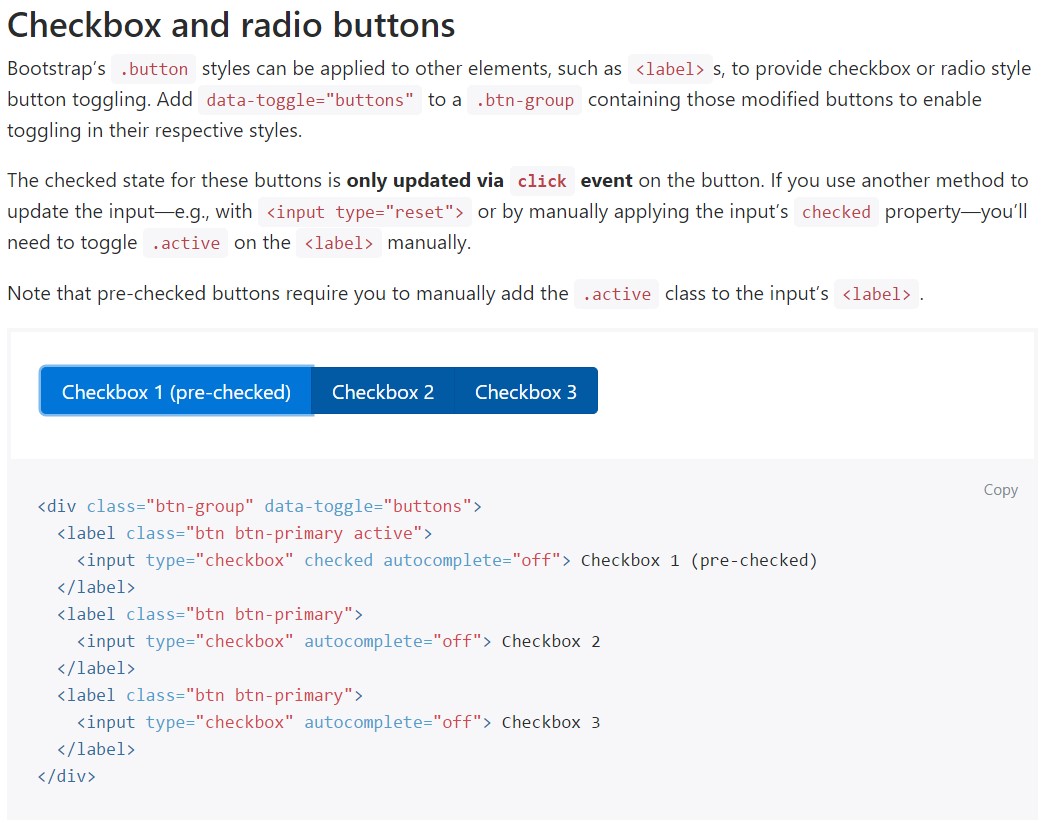
The examined condition for these kinds of buttons is only up-dated via click event on the button. If you use one other approach to improve the input-- e.g., with
<input type="reset">.active<label>
<div class="btn-group" data-toggle="buttons">
  <label class="btn btn-primary active">
    <input type="checkbox" checked autocomplete="off"> Checkbox 1 (pre-checked)
  </label>
  <label class="btn btn-primary">
    <input type="checkbox" autocomplete="off"> Checkbox 2
  </label>
  <label class="btn btn-primary">
    <input type="checkbox" autocomplete="off"> Checkbox 3
  </label>
</div>
In some cases we want to have the checkboxes to come in our forms without the site visitor actually being capable to make any kind of practice clicking on them-- that is simply where exactly the disabled option shows up.
If you want to disable correctly a checkbox in Bootstrap 4 working with the common HTML attribute
disabledIf you really like the concept and indeed really want to carry this out you must designate the
.disabled.form-checkA different scenario
If working with checkboxes, wrap them in a
<label>.custom-control.custom-checkboxEmploy
.custom-control-input<input>Also employ two
<span>.custom-control-indicator.custom-control-description
<label class="custom-control custom-checkbox">
<input type="checkbox" class="custom-control-input">
<span class="custom-control-indicator"></span>
<span class="custom-control-description">Boots</span>
</label>
Bootstrap Checkbox Position forms
Default checkboxes and radios are developed upon with the help of
.form-checkThe disabled class is going to at the same time make lighter the message color to help signify the input's state.
A new element for the Bootstrap version 4 framework is the integrating of the so called customized form features. These are actually the very same elements we are used to inside practicality yet styled much more interesting and also with the Bootstrap approach. Utilizing them you are able to provide fascinating taste as well as style to your information by simply simply just assigning a handful of supplemental classes to the controls you provide in your forms.
To operate custom-made checkboxes wrap them in a
<label>.custom-control.custom-checkbox<input>.custom-control-input<span>.custom-control-indicator.custom-control-descriptionFinal thoughts
That's essentially all that you have to produce in order to place a checkbox element inside your Bootstrap 4 powered web pages and put in a number of custom made flavor to it incorporating it a stylish appeals. Now all you ought to do is repeat the exercise unless you've reviewed all of the checkboxes wanted are currently on the webpage.
Take a look at several video training about Bootstrap checkbox
Related topics:
Bootstrap checkbox authoritative records
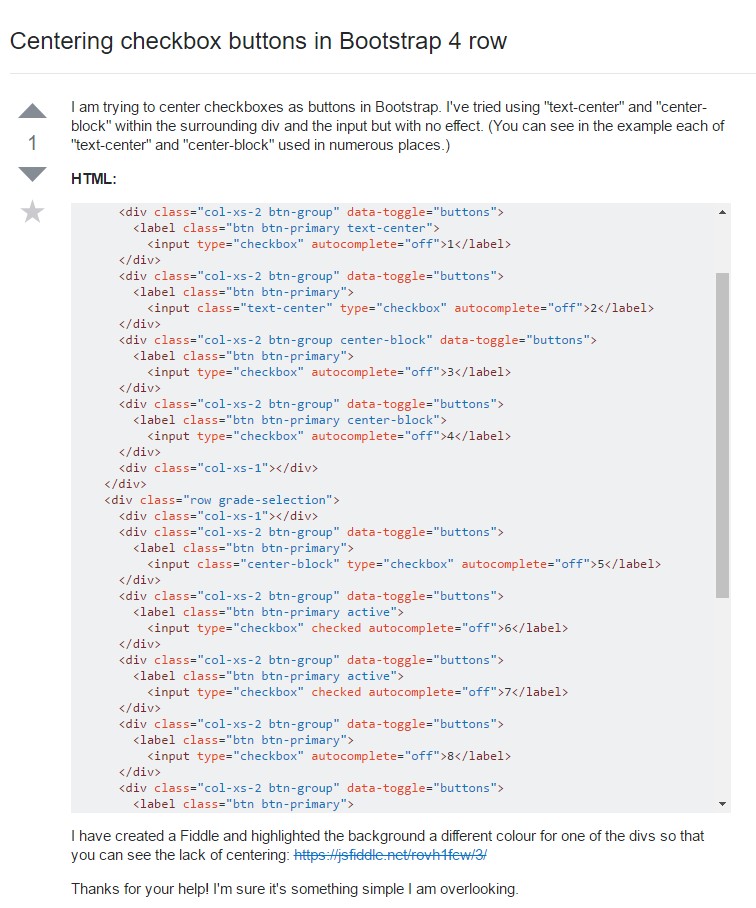
Centering checkbox buttons in Bootstrap 4 row
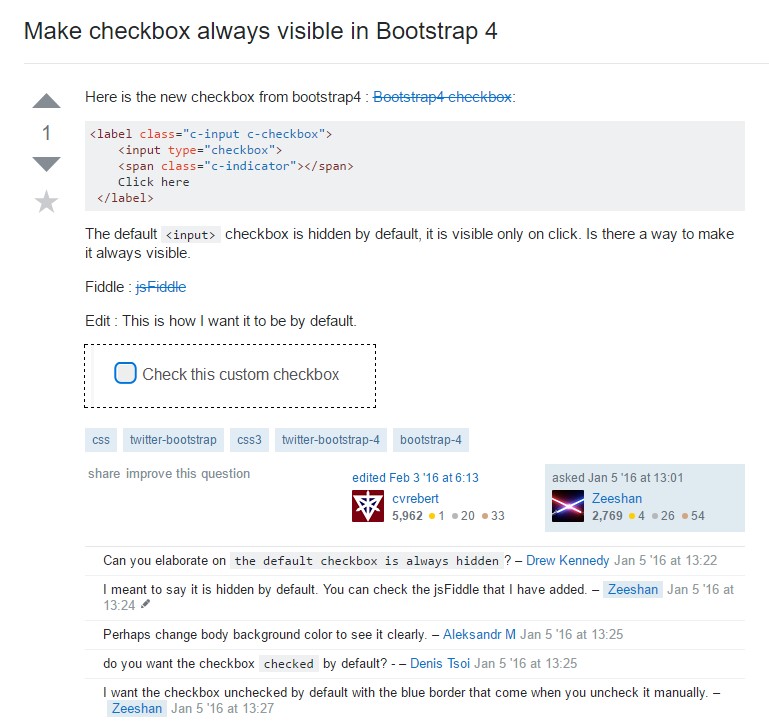
Make checkbox always visible in Bootstrap 4